
1. PLAN
So you want to grow your own cannabis, eh? Before you start there are a few things you should consider. Are you growing indoor or outdoor? Personally, I do both but prefer outdoor because of the limited space I have inside. You’ll need to identify how much space you have as this will determine how many plants you’re able to grow. In Canada, without a production license, it’s legal to grow as many as four personal plants. If you’re growing outdoors skip forward to Step 4. Otherwise you’ll need to purchase a few things. The first thing you should decide on is your tent. Tents range in price, usually according to size. As with most things, you get what you pay for. Next, you will need a light (or multiple lights). This is probably your most important decision. You need to make sure the light you choose is powerful enough to evenly cover your entire space. Generally, manufacturers or retailers will be able to give you this information if it’s not stated in the description. Next, those plants need to breathe. I would recommend an inline duct fan or a desk fan with a clamp. You’ll need an automatic timer to keep your lights on a strict schedule and a hygrometer to make sure your temperature and humidity are stable. Changing your humidity and temperature throughout each phase of the grow can improve overall yield but I keep my indoor grow between 25-27 C and 45-55% humidity.
2. BUILD
Now that you have everything you need, let’s dial it all in. The first thing you’ll do is put your tent together, hang your lights and run your ventilation. When hanging your lights it’s important to make sure you hang them at the recommended height to start. How you run your ventilation will be based on two important questions. The first is: does smell matter? If yes I would recommend a carbon filter but as with everything make sure you do some research on what will work best for you and your specific setup. The second question you should ask yourself when rigging up your ventilation is how you will deal with moisture coming from the exhaust ventilation. Most folks vent to the outdoors but I encourage you to do some research to see what solutions others have come up with. Power on your equipment, remembering to set up your timer for the lights and your hygrometer. Now close up your tent and walk away. Make sure you regularly check on the temperature and humidity for a few days. If you’re having trouble with this step don’t panic. You’re not the first person to run into a problem and a quick Google should get you going in the right direction.
3. NURSE
Your tent is now “dialed in” so it’s time to start popping beans! There are a few different ways this can be done. The one I’m about to describe is based strictly on preference and requires a resealable sandwich bag, paper towel and distilled water. Fold your full sheet of paper towel in half and then in half again. Completely soak the paper towel in distilled water and place your seeds in the second fold. Put the paper towel with the seeds in the sandwich bag and place in a warm dark spot. I put mine under the kitchen sink. In a few days, your seeds will pop and be ready to put in the dirt.
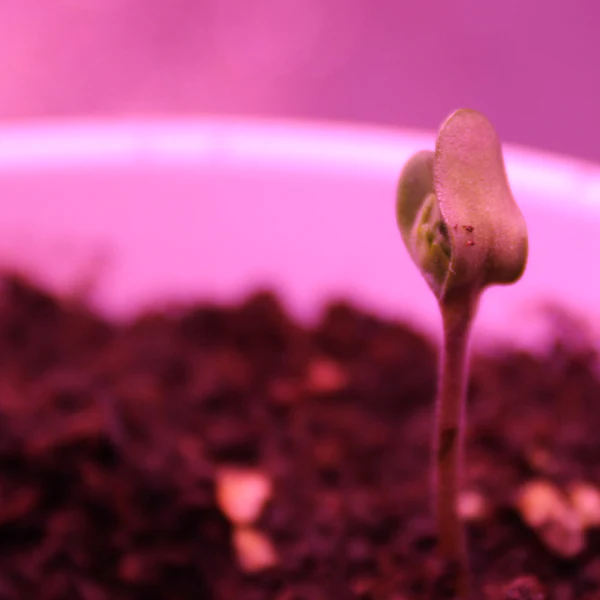
Once your seed has sprouted carefully cut a couple of drainage holes in the bottom of a solo cup and fill it to the top with the growing medium of your choice. There are many different growing mediums and brands but the most important thing is to focus on using food grade products with no added chemicals. Poke a shallow hole in the middle of your soil, place your seed (root first!) in it and then cover over with dirt. In the early stages of life you should water gently until you notice runoff coming from the drainage holes you made. Place the cup on your window sill or in your tent. In a few days, your seedling should break through the soil and you’ll have your first cannabis plant. Caring for your seedling is simple. If you’re growing inside you’ll want your lights on for 18 hours a day. If you’re growing outside you’ll want to make sure you choose somewhere your plants will receive sunlight the majority of the day. During this phase of plant life you’ll want to make sure the growing medium doesn’t dry out too much. An easy way to do this is to water at the same time every day. I prefer early in the morning as it makes sure your plants aren’t thirsty for those first few hours of light. It’s a good idea to check on them mid-afternoon as well, making sure the top layer of soil isn’t dry. This is a fine line to walk: you don’t want to drown the plant but you do want the soil to stay moist. Once your plants are root bound, (i.e. when the roots start poking out the bottom of the solo cup) you’ll need to transplant. I recommend only doing this once during the plant’s life. Fill a larger pot with fresh soil (Remember: DO NOT use soil that has chemical enhancements). Dig a hole in the middle of the pot deep enough to completely cover the roots of your plant. Make sure your plant isn’t sitting too low in the pot as this will reduce proper airflow. Water until runoff occurs then place back under the light. After about 7 days you should start noticing new growth.
4. FLOWER
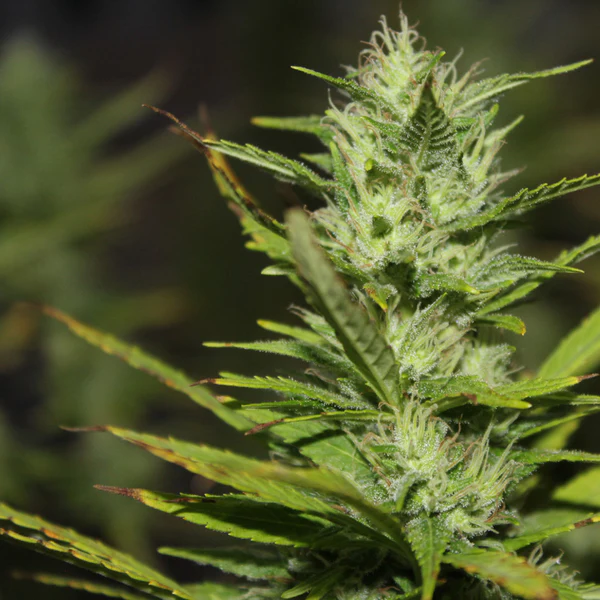
If you’re growing outside then flowering happens with the sun. If you’re an indoor grower you’ll have to decide when to change your light cycle from 18 hours on / 6 off to 12 hours on / 12 off in order to trigger the flower stage. I usually make the change when the plant is about 40% of the height of the tent to allow for the “stretch” phase. Depending on genetics and conditions, plants can double in size during the first few weeks of flower. This next part is the best and worst for me. Watching buds start to form and grow into beautiful flowers over the next five to seven weeks you may get the urge to chop your plants down early but I promise you the wait is worth it. These weeks are crucial for a successful harvest. You should be inspecting your plants regularly for mold and insects. The earlier you catch a problem the easier it will be to correct: time is not on your side at this point. The topic of pests could take up a whole book on its own so I encourage you to do some research ahead of time. Knock on wood, the worst I’ve had to deal with is powdery mildew and in that case I used a product called Doctor Zymes to kill it. The final 3 weeks are preparation for harvest. If you’re using nutrients, follow the producer’s recommendations for flushing. Flushing is the process of using only water to feed the plants, flushing out all the nutrients. Leaving excess nutrients in the plant can negatively affect flavour and the smoothness of a smoke. Nutrients are very commonly used but everyone believes in something different. Although TNB Naturals and Bud Juice are popular brands of nutrients its really something you need to research and see what works best for your environment. Once your flush is complete you’ll want to dry your plants out by letting the soil dry out completely. You should be able to tell that your plants are thirsty before you harvest.
5. HARVEST
Before you start the harvest you’ll want to identify a dark space in which you can control the environmental conditions. If you’re growing in a tent, use that. I use my basement bathroom tub enclosure because it has a fan, is small enough to control the conditions of and it’s out of the way. Cut your plant(s) down and hang them in your designated space making sure they have space for air to circulate around them. Over the next five to seven days you’ll want to make sure the plants are drying at an even pace. You don’t want them to dry out too fast or too much. Once your plants are dry it’s time to trim if you haven’t already done so. The last step is to cure your cannabis. We do this for the same reason we do it for vegetables: preservation. When cured properly, organic material lasts much longer in storage. Place the trimmed buds in an airtight container (I prefer to use mason jars) but be careful not to pack the buds too tightly. Seal up the jars and place them in a cool dark place. For the first week you’ll need to burp the jars several times a day. When opening the containers pay close attention to the smell and texture of the buds. The smell of ammonia means the bud is too wet for curing. If the buds aren’t dry enough you could end up with mold. After the first week, you’ll only need to open the jars every few days or so. Although it theoretically takes four to eight weeks for a full cure I’ve found a quality sesh can be had after just two to three weeks,

